When you’re getting into wood burning, there’s not much that you need to learn. You just familiarize yourself with using the pyrography pen, and you should be good to go. Over time you’ll get better at outlining, creating shapes, and shading with the tools that you already own. However, there’s still one element missing that is almost always there in great art pieces: color.
Learning how to add color to wood-burning projects can improve your outcomes and have you wowing at your creations. As you’ll see from the guide below, it’s also not very complicated.
There are various ways to add color to a wood-burned project, and the option you pick will depend on your mood, the coloring tools available, and other factors. However, even before you start coloring, there are a couple of things to check for. One is that you should have the right wood for the job. Some of the best wood options for pyrography include beech, pine, oak, cherry, and more.
Next, you need to decide whether you’re going with an original design or something made by someone else. If you’re not artistically gifted, the latter might be the only option for you. Using the same colors as what is in the original design is generally advised. However, before transferring the design to the wood, you can put it on several pieces of paper and try out different color combinations to see if they would work.
For those who’re artistically gifted, you can color your original designs however you want to. That said, you might also want to see how the result would look like before you put it on wood. For the sake of those who are new to wood burning in general, we will start with getting your outline on the wood.
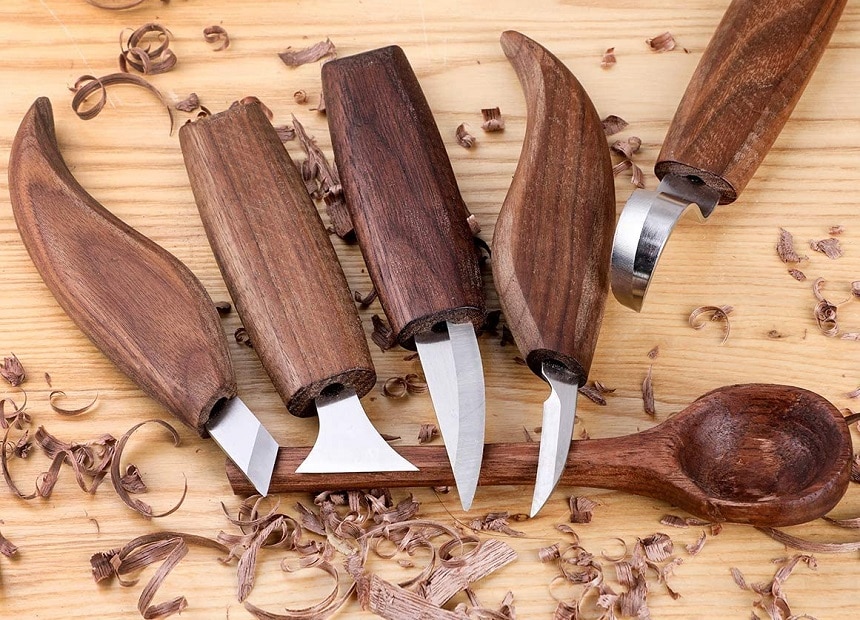
The tools you’ll need include wood, a wood-burning unit/pyrography pen, carbon paper, tracing paper, a scribing tool, sanding paper, blue tape, and a ruler. Any other tools you might require will depend on what you’re using to color the wood.
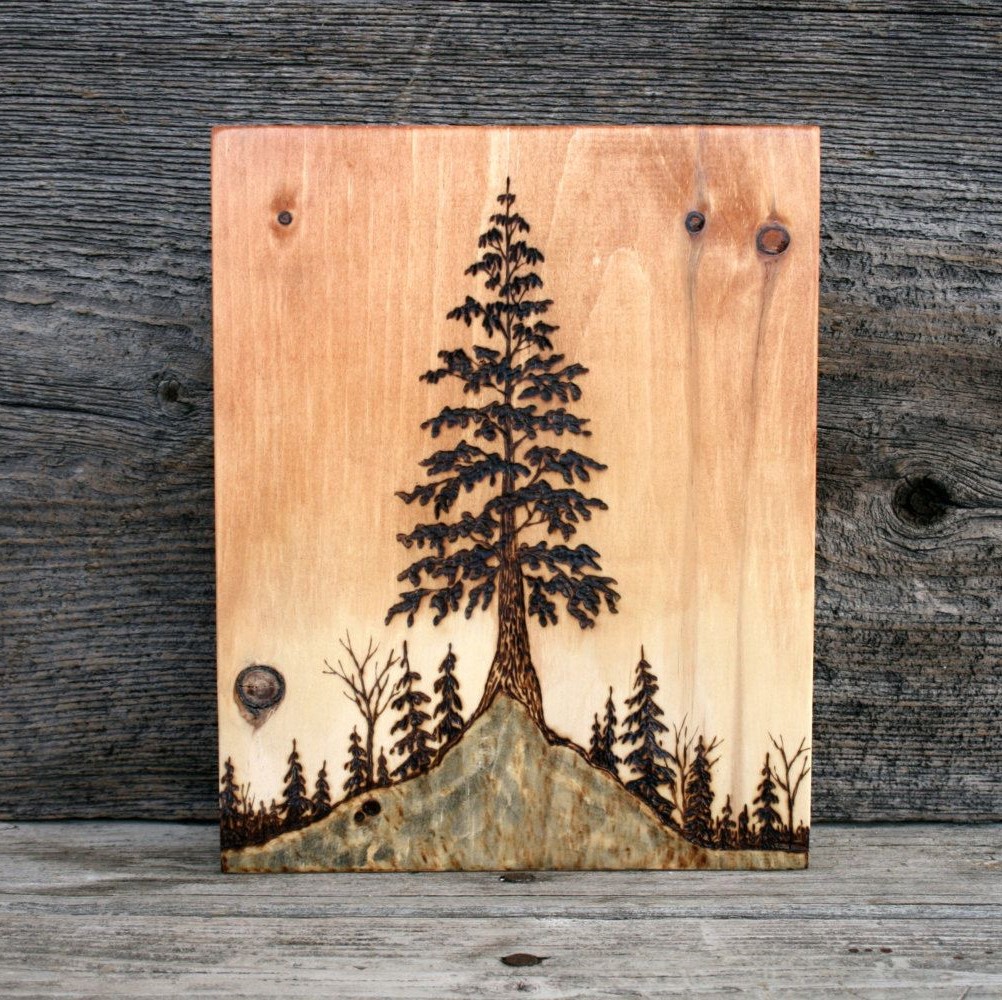
First, you start by selecting your design of choice. Ensure it’s compact enough to fit on your wooden canvas. Additionally, you don’t just pick a random design. It has to be something you consider beautiful otherwise, what would be the point of permanently engraving it on wood.
After you find the design of choice, you can transfer it onto a piece of the tracing paper mentioned before. The tracing paper will make it infinitely easier to transfer the design onto the wood. As such, be careful not to miss any lines during the transfer process. Sticker paper has also been used to great success when transferring an image onto a wooden surface.
After that, you prepare your wooden surface. Use a piece of coarse sanding paper to work it over. For damaged wood, the coarser the paper, the better. That said, 220 grit sandpaper is a good place to start. Remember to get rid of the wooden particles left on top of the wood.
Tack cloth is a great option for wiping the wooden particles off the surface. Also, avoid bringing moisture anywhere near the surface you’re about to work on. It tends to raise the wood grain, which can lead to some problems down the road.
Once the wood is ready, you can place the transfer paper with the design on top. Secure it with blue tape. Remember to cut the transfer paper small enough to fit on the surface of the wood. That way, the tape will be able to hold it in place.
Also, leave one side of the paper open. This will allow you to fit a piece of carbon paper between the wood and tracing paper before closing the final side. If you prefer bolder lines on the wood before burning, a newer carbon paper is ideal. On the other hand, you can reuse old carbon paper if you want lighter lines on your work surface.
You should be aware the carbon paper will likely leave traces of greasiness on your wooden, although not much. That said, grease does sometimes affect the coloring process negatively. If you printed the design on sticker paper, you can place the design onto the wooden surface and use a sharp edge such as a ruler to transfer the image.
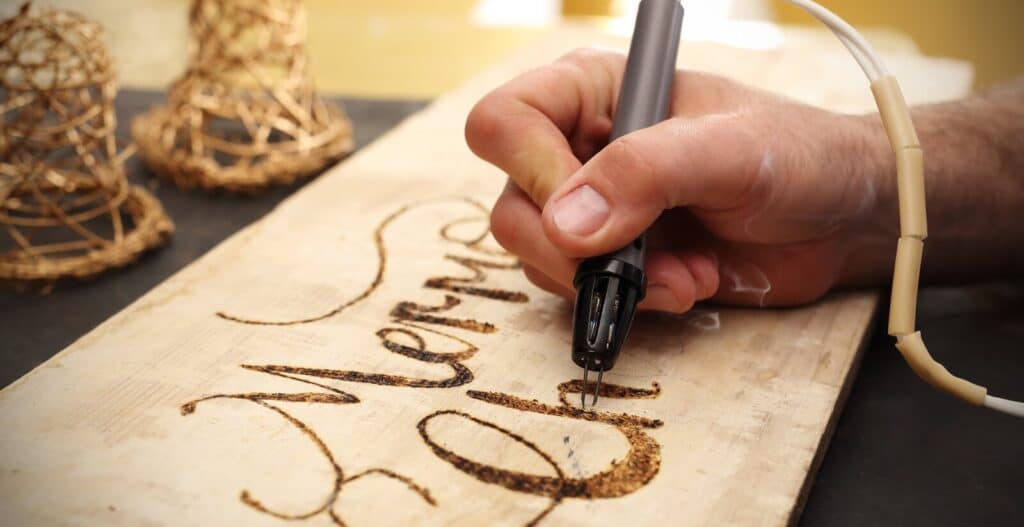
After that, you just outline the design on the wood with your pyrography pen. If it’s your first attempt, you might want to use a scrap piece of wood. Try to get used to the pen by drawing lines, circles, and anything else you can imagine. This will allow you to get a feel for the pen and how long you need to hold it in a particular spot to get results. Remember, you can ruin the whole piece by holding the pen in one place for too long.
Your pen will likely leave some carbon lines as you go along, and you’ll need to erase them before you start adding color to wood-burning projects. While artist erasers come in many pigments, you should only pick a white option for the job. This ensures you don’t leave any streaks on the wood that might be a problem later on.
Also, carbon will likely stick to the tip of your pen during use, and you might need to clean your pyrography tips a few times before you’re done. After that, the information below tells you how to add color to wildlife wood burning and other such projects.
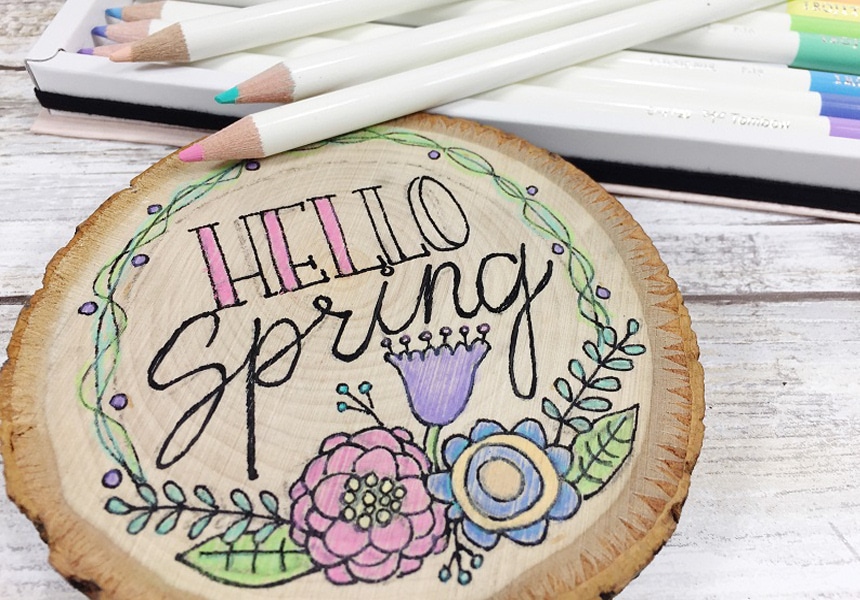
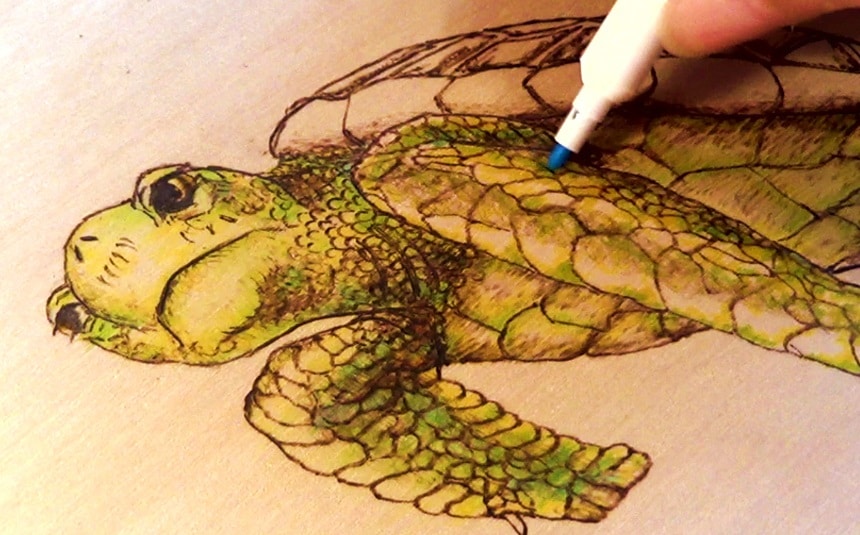
There isn’t any rule against using colored pencils to add color to wood-burning hummingbirds, wolves, elephants, or whatever design you used for your project. However, the type of colored pencil you use will definitely affect the result.
There are two alternative pencil types to pick from. The cheaper one is generally more accessible, and you can find it in bookstores, office supply stores, and many other stores near you. These feature a hard tip because they have a clay core. Notably, the more you color with this type of pencil, the less you’ll see the burned lines underneath. As such, you don’t want to layer too much if you use a clay-core colored pencil.
Alternatively, there are colored pencils used by artists. They are more expensive, but they come with a wax core. As such, you can layer as much as you need to without eclipsing the burned lines. You can also combine varying colors by layering to produce different results and hues. If you want more vivid colors, add more layers for both pencil options.
It’s generally recommended that you use a sharp-tipped colored pencil to add color. Additionally, you should strive for thin layers as you use the pencils. This will require a very light touch until you’re done layering.
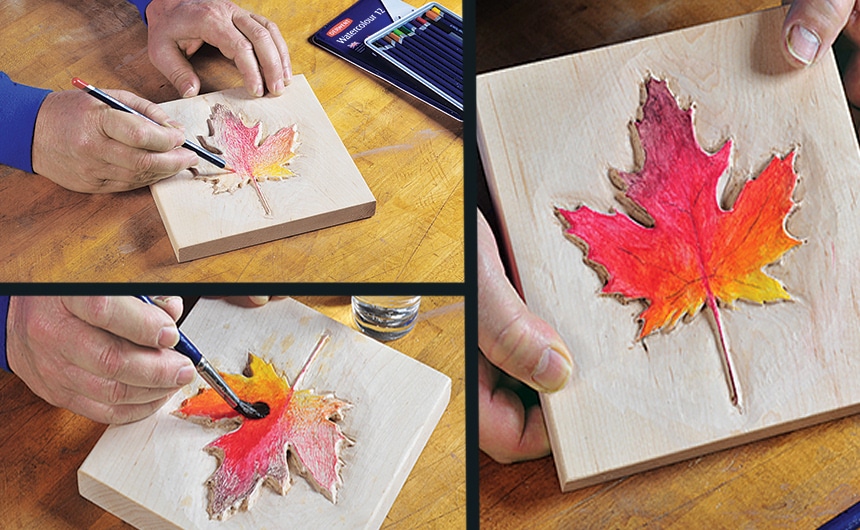
Watercolor pencils are another favorite for people looking to add color to their wood burning. Just like regular colored pencils, the effect you achieve on the wood will depend on how you use these pencils. For instance, you can achieve the same effect as regular colored pencils by shading using these watercolor pencils.
The color will be on top of the wood, and you can layer more if you want brighter, more saturated colors. However, since they are also watercolors, you can treat them with water to make the pigment more transparent. That said, it tends to raise the wood grain, thereby negatively affecting the whole project.
One way to work around this is to use rubbing alcohol as an alternative to the water. It will still lighten the paint left by the pencils and allow it to sink deeper into the wood. However, it doesn’t come with the disadvantage of raising the wood grain.
Notably, how you go about this is you color the wood with a pencil. After that, you take a paintbrush, dip it in the rubbing alcohol then use it on the colored section of wood.
The Detail Paint Brush Set comes highly recommended by past users for these kinds of projects. There are 12 miniature brushes in the set that work with watercolors, acrylics, oil paints, and more. Additionally, just as the name suggests, their size makes them ideal for such detailing projects.
Another tip is that the white-colored pencil seems washed out when you use it in conjunction with alcohol. As such, you may want to find an alternative such as white acrylic paint.
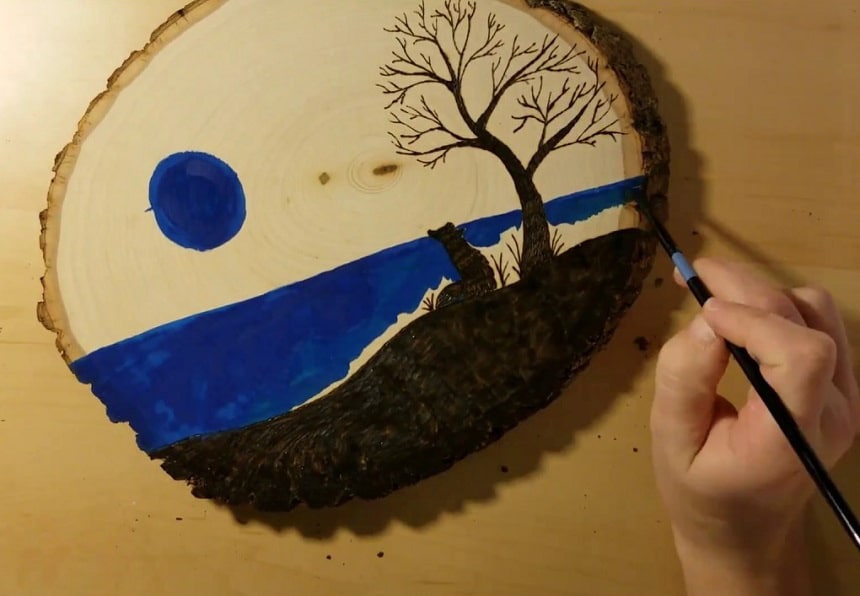
You can also opt to use watercolors Trusted Source Watercolor painting - Wikipedia Watercolor (American English) or watercolour (British English), also aquarelle (French, from Italian diminutive of Latin aqua “water”), is a painting method in which the paints are made of pigments suspended in a water-based solution. en.wikipedia.org on your pyrography project. Just as is the case with watercolor pencils, watercolor paint will sink into the surface of the wood. Additionally, there will be changes in the outlook of the colors depending on the surface of the wood. As such, watercolors are fairly unpredictable. You can use a similar piece of wood to test how the colors react before coloring the art.
Notably, you can add more layers of paint on the wood depending on how pronounced you want the colors to be. Also, we mentioned earlier that water tends to have a negative effect on the wood grain. Consequently, you should mix the paint with as little water as possible. There have also been some arguments in favor of using rubbing alcohol instead of water.
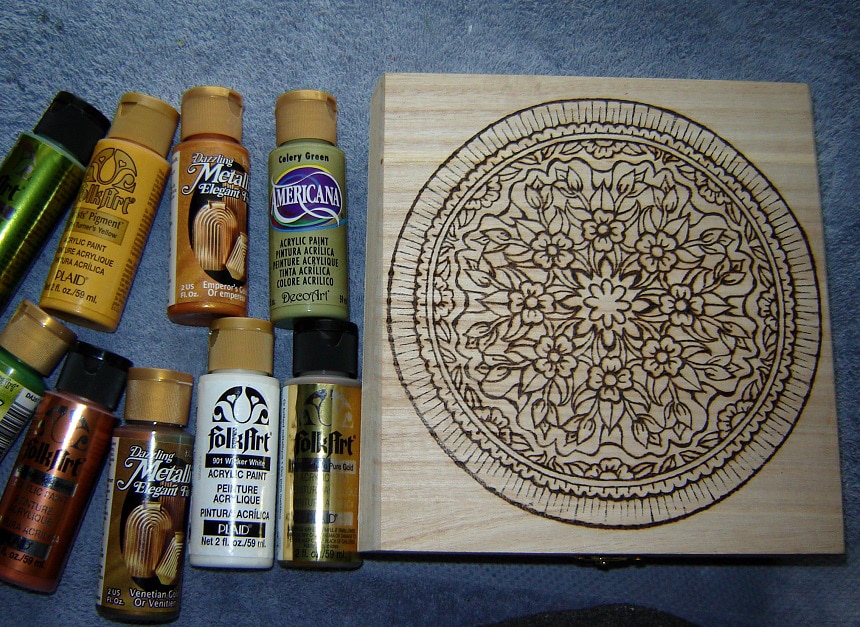
One major benefit of using acrylic paints Trusted Source Acrylic paint - Wikipedia Acrylic paint is a fast-drying paint made of pigment suspended in acrylic polymer emulsion and plasticizers, silicon oils, defoamers, stabilizers, or metal soaps. en.wikipedia.org on wood is that they’re thick. As such, they are easy to control, which is necessary when adding details to the artwork. You can experiment with thin and thick layers on scrap pieces of wood to know which you prefer.
According to most reviewers, the Crafts 4 All paint set is one of the most reliable acrylic options for finishing pyrography projects. The colors produced are both vivid and can hold their own against the test of time. Additionally, they come with three acrylic paint brushes just in case you don’t have a set.
Another feasible alternative for coloring your wood-burning projects is markers. While they flow easily, they’re also easy to control once you know how to work them. You should use them on a few pieces of scrap wood before you use them on your wood-burning projects so that you can get a feel for them. Also, they seem to be similar to watercolors in that they can bleed if the wood is too soft.
We’ve listed five options you can turn to when you decide to color your pyrography projects. However, these aren’t the only options available. You can purchase and try out food dyes, oil paints, crayons, chalk, and even some wood stain options.
Try to experiment with only one option at a time. That way, you can find out how each of the options reacts when put on wood. This experiment might take a while to complete, but if you’re a fan of DIY projects, it should be lots of fun. Additionally, you’re bound to produce a couple of interesting art pieces during the process.
Can you wood burn over acrylic paint?
It’s better to start with the wood-burning, then you can finish up with the acrylic paint later. After that, it will totally be up to you whether to use thin or thick layers. As we mentioned above, acrylic paints are easier to control when used on wood.
Can I use oil paint on a wood-burning?
It’s possible to use oil paint to color a pyrography project, although there are a couple of things to note. One is that if it’s thick, it will peel off quite easily. However, if you use a gesso primer, you get to maintain the thickness of the paint without the disadvantage of peeling.
Alternatively, you can opt to thin it with mineral spirits, although that will give you the same thin texture as watercolor paints.
For how long should I wait for my wood-burning project to cool before I add color?
Always ensure that your pyrography surface is completely cool before adding color, as the heat might affect your project negatively. However, the wood shouldn’t take more than five minutes to cool down.
Worth noting is that the designs will get scratched easily if you leave your wood-burning project exposed after you finish coloring. Additionally, some of the colors can peel off over time. As such, the final touch should involve adding a bit of varnish to preserve your art.
Although you generally have more vanishing options with examples such as linseed oil, Shellac, and polyurethane, not all of them will work with wood-burning. However, Lacquer is known for giving excellent results, and if the final result is too glossy, you just reduce the effect with lacquer thinner.
You should now know how to add color to wood-burning projects, and the only thing left to do is practice and experiment. Remember, you can always get more pieces of scrap wood to try out your designs if you need to.